To get started using Visual Composer Website Builder, you need to install the plugin first. It's very easy to install the Visual Composer plugin. You can install Visual Composer plugin by following these steps:
- Go to visualcomposer.com/get-started
- Enter your email address and click “Get Started”

- Click download on the free version column.
- You will automatically download a Visual Composer plugin in .zip format.
After you download the plugin, you need to upload it to your website by following these steps:
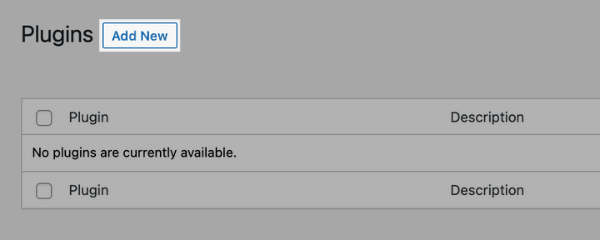
- Open your WordPress Admin panel and navigate to Plugins
- Select 'Add New' (left side corner)
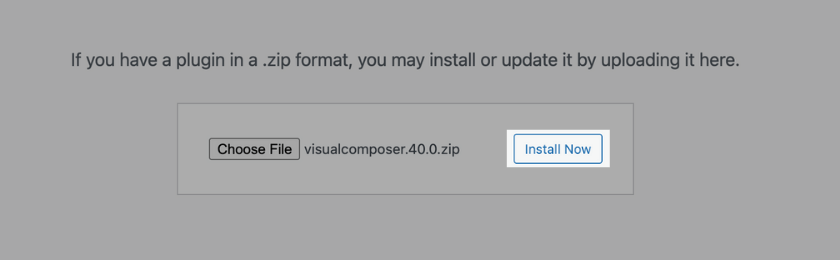
- Select 'Upload Plugin' (upper left corner)
- Choose the visualcomposer.zip that you have downloaded before and click 'Install Now'
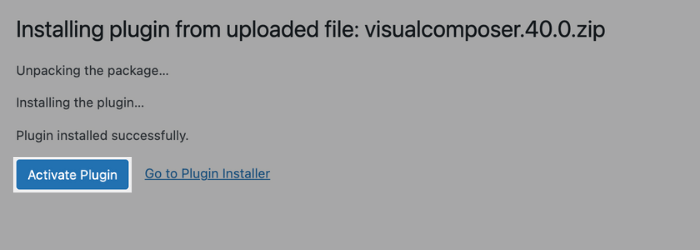
- WordPress will install the plugin automatically
- Click 'Activate Plugin' to finish the installation
Install Visual Composer from WordPress dashboard
You can also install Visual Composer directly from your WordPress admin dashboard. To do it, follow these steps:
- Log into your WordPress Admin panel;
- Go to the Plugins section;
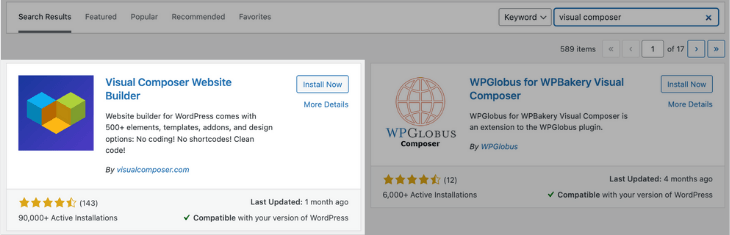
- Click on “Add New” at the top;
- Type “Visual Composer” in the search bar;
- Locate “Visual Composer Website Builder” and click on “Install Now”;
- Click on “Activate” to finish the installation.
Now you have installed Visual Composer on your website and get access to the Visual Composer Hub - an online library of content elements, templates, and extensions.